Wednesday, June 13, 2012

rigging

jaw-jaw turnbuckles and eyes or single-jaw turnbuckles and studs?

1/4" wire 1/2" pin hayn: $46.35
jaw-jaw 1/2" turnbuckle:   $77.56 
------------$124
increased flexibility (so?)
more stuff to break/fall out

 1/4" wire 1/2" thread hayn stud: $38.78
single-jhaw 1/2" turnbuckle:  $56.00 
---------------------- $94
 
less flexibilty (so?)
less stuff to break
less stuff to catch other stuff
$30 cheaper (x4 + >30 x 2 capshrouds+>>30xbackstay==ca. $200)
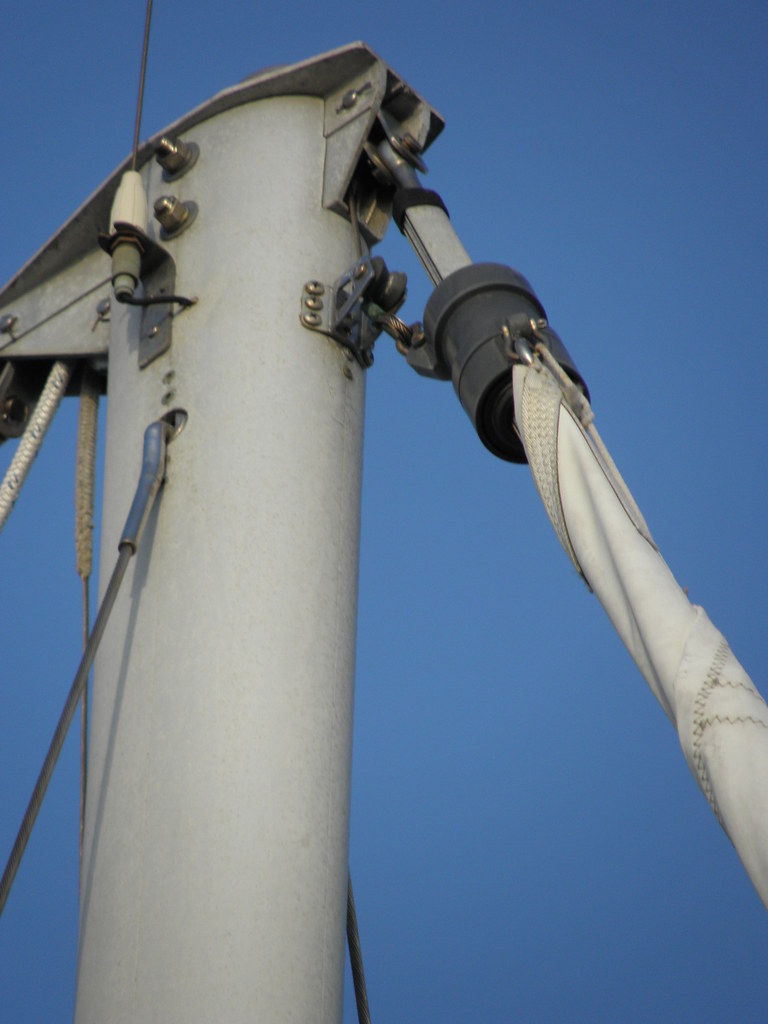
------------------------------------------------------------------

Furler Guts

taking the sail feeder off didn't do anything - just crusty red loctite, and nothing moves. I suppose that's good....


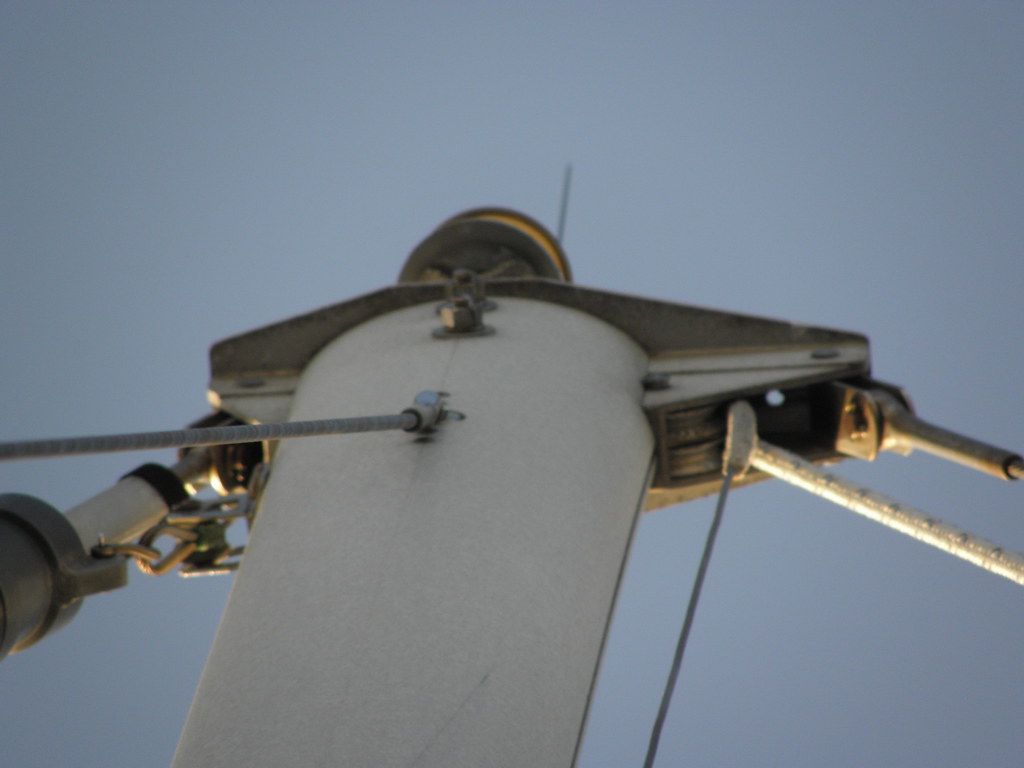
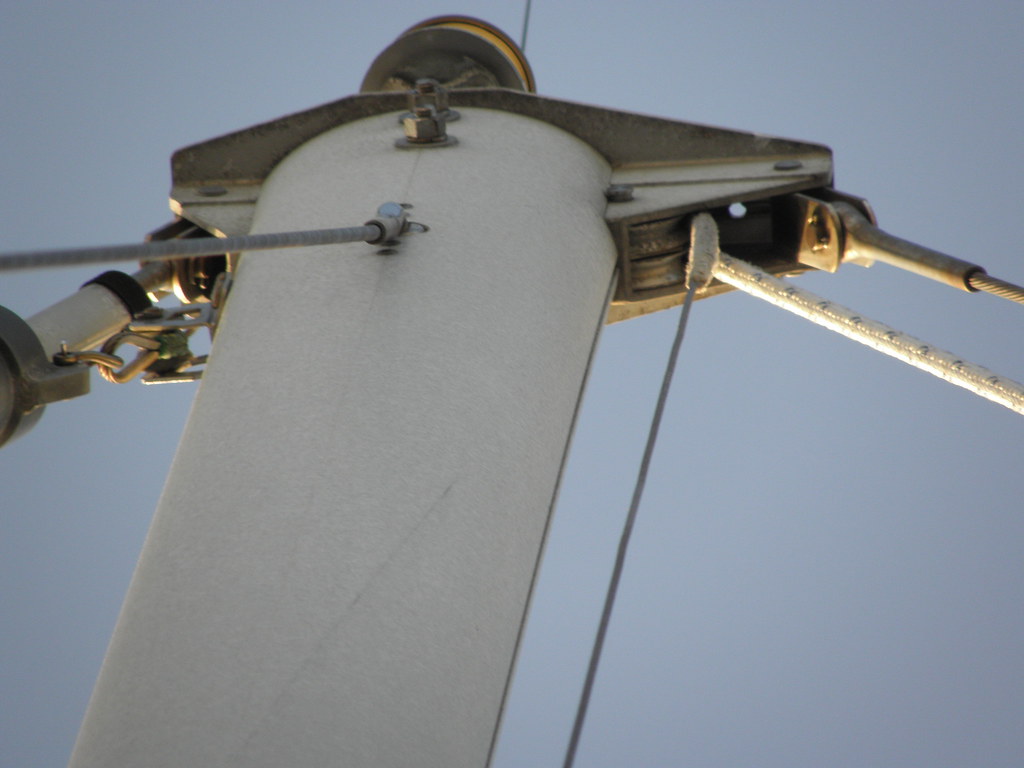
Extrusion pulled up as far as it will go. It hits the masthead junk here. The big round doohickey is the internal turnbuckle, I think, and the long skinny jobber that's normally inside the extrusion looks to be an extra long swage fitting on the end of the wire. I hope. Maybe.

View of whole system with extrusion up as far as it will go


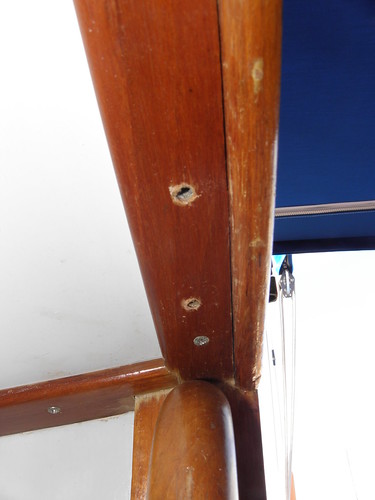
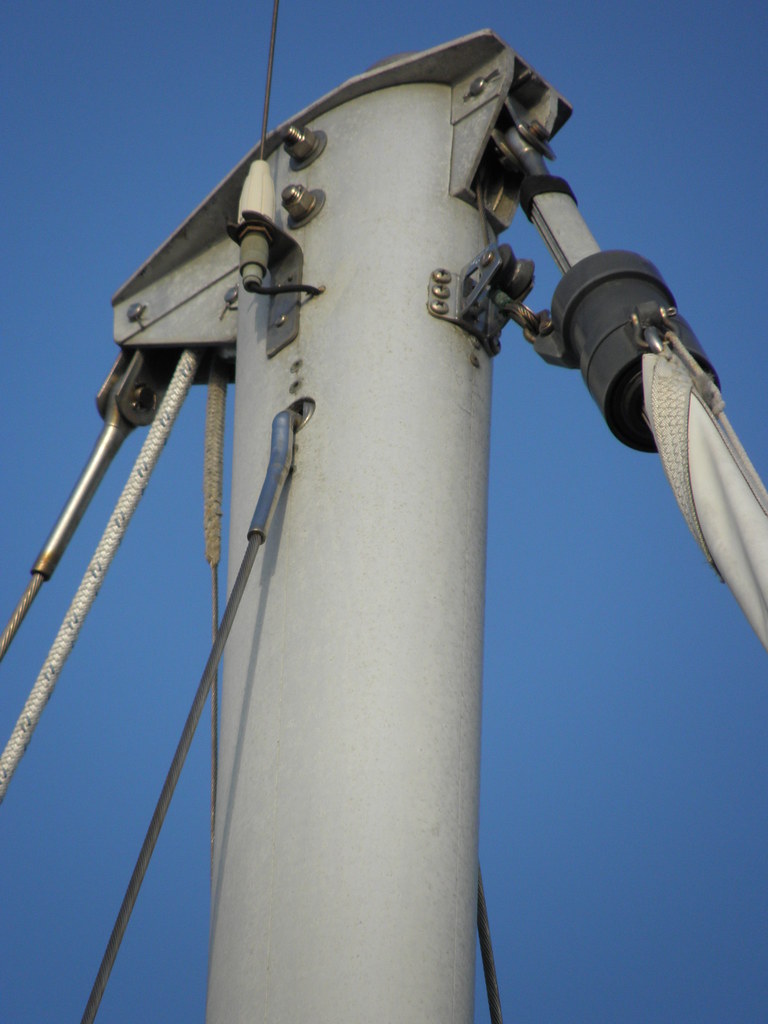
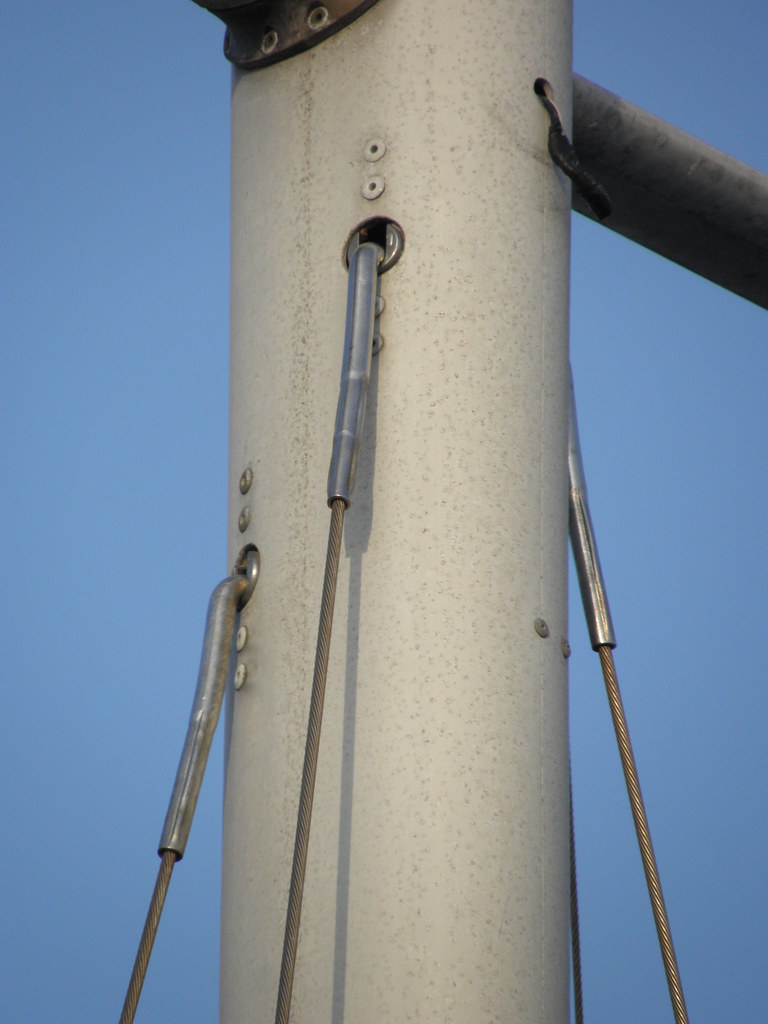
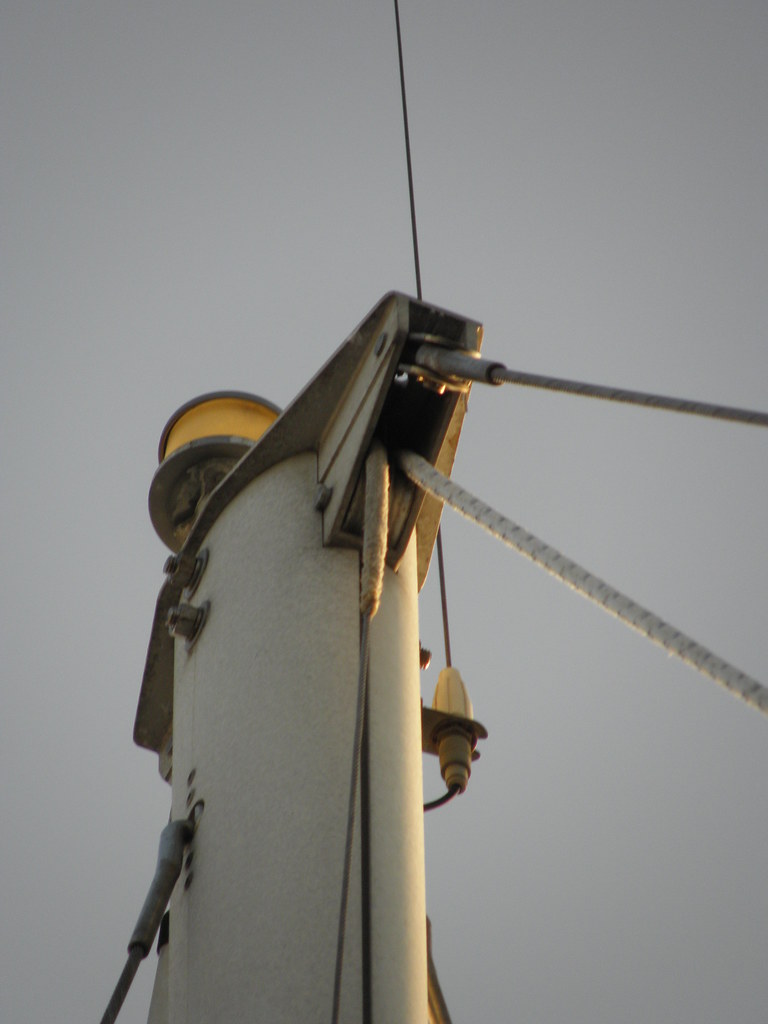
Shroud-->mast terminations

zoom and squint


P1283637 P1283644 P1283645 P1283647 P1283658 P1283659 P1283660 ------------------------------------------------------------------------
Bobstay
5/16 cable @ 6'
UpperTerminal - 5/8" eye - http://goo.gl/oYQ2W
LowerTerminal - 1/2" fork - http://goo.gl/a7NGn
Turnbuckle - 5/8 toggles - http://goo.gl/n504j
SpecialConcerns: The pin at the waterline seems small


Forestay/Furler
FurlerModel: Harken Series 1-193
5/16 cable @ 38'6" (order 40)
UpperTerminal - 1/2 eye - http://goo.gl/RDmNA
LowerTerminal -
Turnbuckle - none
SpecialConcerns
- 2" from top pin to furler-foil
- not sure what is under the drum on the bottom

Backstay
5/16 cable @ 39'6" (order 41)
UpperTerminal - 1/2" eye - http://goo.gl/RDmNA
LowerTerminal - 5/8 eye - http://goo.gl/oYQ2W
Turnbuckle - 5/8 toggles - http://goo.gl/n504j 

Upper Shrouds
9/32 cable @ 35' (order 36x2=72)
UpperTerminal - T-ball - http://goo.gl/Mr8rp (x2)
LowerTerminal - 1/2" eye - http://goo.gl/Amno4 (x2)
Turnbuckle - 1/2" toggles -  http://goo.gl/8YRya (x2)

LowerShrouds
1/4" cable @ 19' (order 20x4=80)
UpperTerminal - T-Ball - http://goo.gl/DXuNy (x4)
LowerTerminal - 1/2" eye - http://goo.gl/PZF1c (x4)
Turnbuckle - 1/2" toggle - http://goo.gl/8YRya (x4)


Thursday, March 22, 2012

washdown

Jabsco Par-Max 4.0 pump under head sink, teed off toilet intake, deck fitting by anchor. Sweet!

Pump. Out of the way, tolerable access.
Deck fitting. I was going to go with a flush-mount system, but in the end decided to stick with simplicity at the severe cost of having to twist a hose end for a couple seconds every now and then. I'll live.

tillerpilot

Raymarine 2000+ in hand - waiting on a bracket...

solar

After much arm-waving and boat-stalking and soliciting opinions of how exactly to put a usable amount of solar on a pointy double-ender, I found Custom Marine Products' solar mount. It's a really great idea, but 1) it's $800, and 2) I couldn't figure out where to put it on my boat. So, I ordered about $200 worth of junk from onlinemetals and McMaster-Carr and got out my trusty sawzall.

2 100-watt panels mounted on poles above the pushpit. These twist and swivel - here one is "up" (in back) and one "down" to catch the morning sun. (Mid-March 38*N)
125W panel on the dodger
Morningstar 45-amp MPPT charge controller. Plenty of capacity to grow.
9-ish AM. Mostly-full batteries. Backstay shadow on one 100W panel, boom shadow across dodger panel, dew on all the panels, kinda-sorta pointed sun-wise. 11.5amps. Whoa!

Table

The boat came with a very nice teak table plonked down right in the middle of everywhere and taking up way too much room.


We finally just unbolted the thing shoved it under a bed. We've tried various folding and rolling and collapsing tables, but all of them found a way to piss us off in one way or another. Dogs and babies and coffee habits and boats and shitty tables don't go so well together - who knew?!?

So, after a year or so of staring and drooling, a masterpiece emerges. It's perfect. It's wonderful. Sadly, it's also a mockup of a real table, made from $14 of Home Depot ply"wood," (can wood be that shity??) mostly cut out with my trusty sawzall. The heavy-wall stainless and teak slidy-hinge-thingee is real enough, so I just need to find wood, skills, and/or tools, replicate the table, and screw it to the hinge-thingee. If anyone knows someone in the SF Bay area who'd like to make me a real table...

The hinge is 2 pieces of 1.5" teak - crappy plantation stuff, but at least it was expensive - and 36" of heavy-wall 316 stainless tubing. The table is held on by 4-inch screws.


One bulkhead table, folded up out of the way
Folded down, folded up, slid in - it's almost entirely over the starboard setee and out of the way.
Open but not slid out, the boat is still mostly usable, although the head door won't open in this configuration.
Open and out. It's a couple inches narrower than the original table, and comfortably seats 4.
"Normal" position - easy access to head and V-berth, plenty of room for a laptop and legs. Also, I wanted to show that we really do own cushions. See the scars from the old table on the sole.

I think this is going to work well.

Also, if someone wants to buy a pedestal-mount table made out of 5/4 old-growth teak, make me an offer.

Electrical: Part - uhh, lots

Starting from the "starting battery" has always been dicey at best. So I finally sucked up and replaced the battery cables that weren't replaced during the initial electrical upgrade and - viola! I have a spare electrical system that - you know - will start the boat! I also have all new, all oversized battery cables now. No idea why I didn't just do that in the first place...

Monday, November 28, 2011

sail handling

Lazy jacks. Got em.

Slab reefing. Check.

Pictures? Crap....

Sunday, November 20, 2011

Monitor Self-steering

I managed to make it through an entire Monitor installation without taking a single picture. Whatever - it's stupid-simple to install, and works like MAGIC! Pictures to follow. Eventually. Maybe.

Tuesday, November 8, 2011

Refrigeration

Top off. Insulation was dry and looked good. Surprising.

Liner out

And plywood liner-liner out

Original structural newsprint.

For sale: 1 icebox liner. Small dent, will buff out easily.
Sawzall action complete.

Engel drop-in enroute.

Updates imminent. (Eventually!)

The Engel arrives, with giant thermos for scale.
Helpful instructions. Yep, that's pretty much all of it. Now we have to find something printed in Korean....
Fitting

I added anywhere from 1 to 3 inches of foil-backed blueboard insulation around the already-insulated Engel box, because why not.
The box is hanging from a composite plywood ring. There's also some aluminum angle in there to stiffen things up.


TA-DA! The trim ring is cheap pine, and I'm slowly replacing all the counter tops with cheap laminate flooring. We're sort of waiting until we get to somewhere with cheaper and more reliable labor to do something fancier, but in truth I don't mind the "poor man's yacht" look....
We also ended up with a new large locker. No idea what we're going to do with this yet.

Tuesday, March 8, 2011

chartplotter

I wanted to mount my new Garmin 740s where it would be usable from the cabin and the cockpit, so a swing mount made sense. My companionway is lined with hand holds, and the inner cabin wall housed the compass and a light fixture, making room tight. I couldn't find a manufactured mount that fit right, and I didn't trust the PVC option (from a recent Good Old Boat magazine) to hold up a couple thousand dollars in electronics.

I had a foot-long teak 1x4 laying around, so I bought a small teak cleat mount, a 1/2"x3" stainless bolt, a nut, and some washers.

I first notched the cleat base so it would fit over companionway trim, and beveled it so the "top" (which fases down in this application) was level. I drilled a 1/2" hole, and using my wood chisel recessed the head of the bolt and expoxied the bolt in place. The block is secured with 2 1/4"screws into the companionway frame. A stack of washers provides clearance. The GPS is mounted on the provided bail mount, installed upside-down. A pair of heavy stainless fender washers sandwich the teak "arm" to provide a bit of extra support, and a stainless lockwasher keeps everything in place. I'll probably locktite the nut once everything is settled in. I'll take it all apart and finish the wood - eventually.


P3083755
Cleat base notched, beveled, and drilled

P3083756
recessed bolt

P3083757
mounting pilot holes drilled in companionway frame, through trim

P3083758
Finished product. The internal GPS works great, even through the bracket, teak board, cabin top, and dodger!

P3083759
The hinge point
Next up: Installing a transducer and my new GMR 18 radar dome.

GARMIN 200/50 KHZ 12/45 DEG. ADJUST IN-HULL TRANSDUCER mounted under the starboard setee. It's glued on with 4200 and filled with mineral oil. I could only find foo-foo scented mineral oil at my local CVS, so the boat smells like a whorehouse now.

Closeup of the transducer mount. Performance has exceeded all expectations, and I have no holes in my hull.


 I decided to pull the mast to install the radar. I really liked the idea of having the radome up and out of the way rather than on a pole in the cockpit, and I'm pretty sure the mast hadn't been off since it went on in 1982.


KKMI hooked me up with a shed to work out of the rain. They're a little expensive, but the service is spectacular. I ended up pulling the mast on a Friday evening and sticking it back in the next Monday morning. Then I slept for a couple days.
Stick-less. Ouch.
The radar is mounted on a SeaView platform below the spreaders.


I added Antal fiber mast steps while I had the mast down. One of the best things I've done to the boat.
All new wiring, including the radar wire. I spent most of the weekend trying to stuff all that shit through the mast-to-deck hose and fittings.

Ta-Da!